

As part of a university assignment, I created this piece. The exercise was in lighting, rendering, and compositing. Prior to this, I had barely any experience in compositing and rendering, so I found it a very educational experience.
It was created in Maya, using Vray 2.0, and then comped in Nuke.
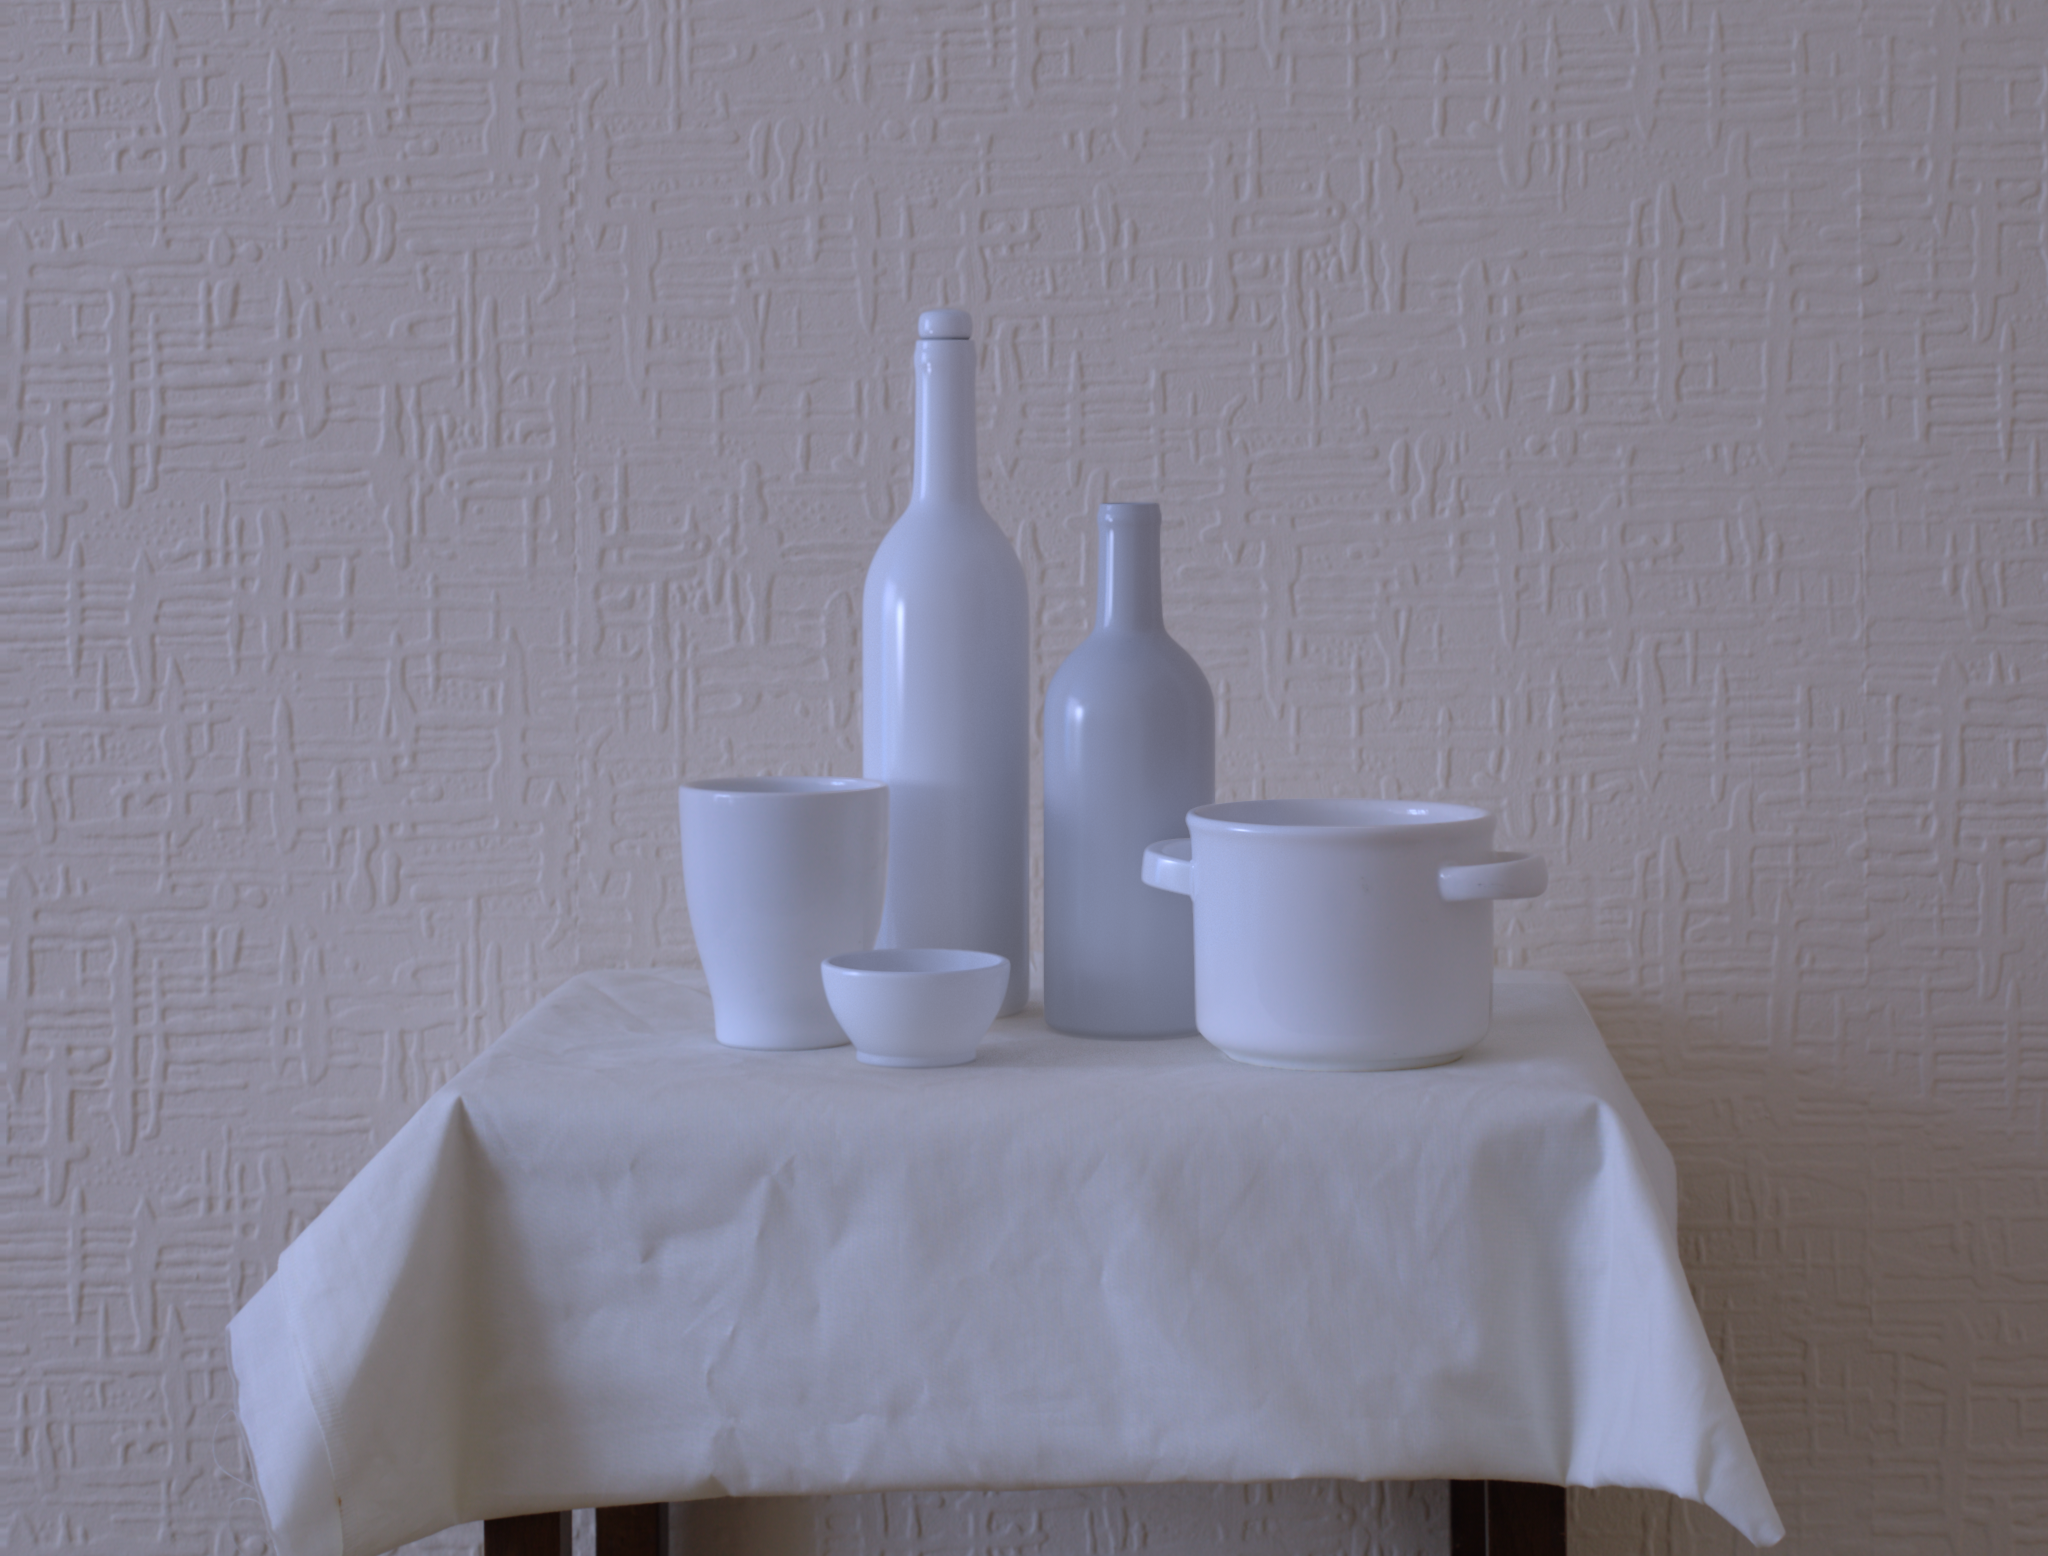
The assignment was to create a final render based on the style of a chosen artist. I chose William Brooker as I really liked his balanced and calm compositions.

I photographed my backplate using the Canon 5D Mark II, a Sigma 8mm f/3.5 fisheye lens, a Canon 50mm f/1.8 lens, and VR panoramic tripod. I also used a colour checker chart, and light probe set, consisting of a white, grey, and chrome ball.
The 50mm was really good at replicating Brooker’s flat perspective style. It was a treat to use and I actually found the process really fun. I shot using the 5D’s automatic exposure bracketing to capture the HDR range for each image.

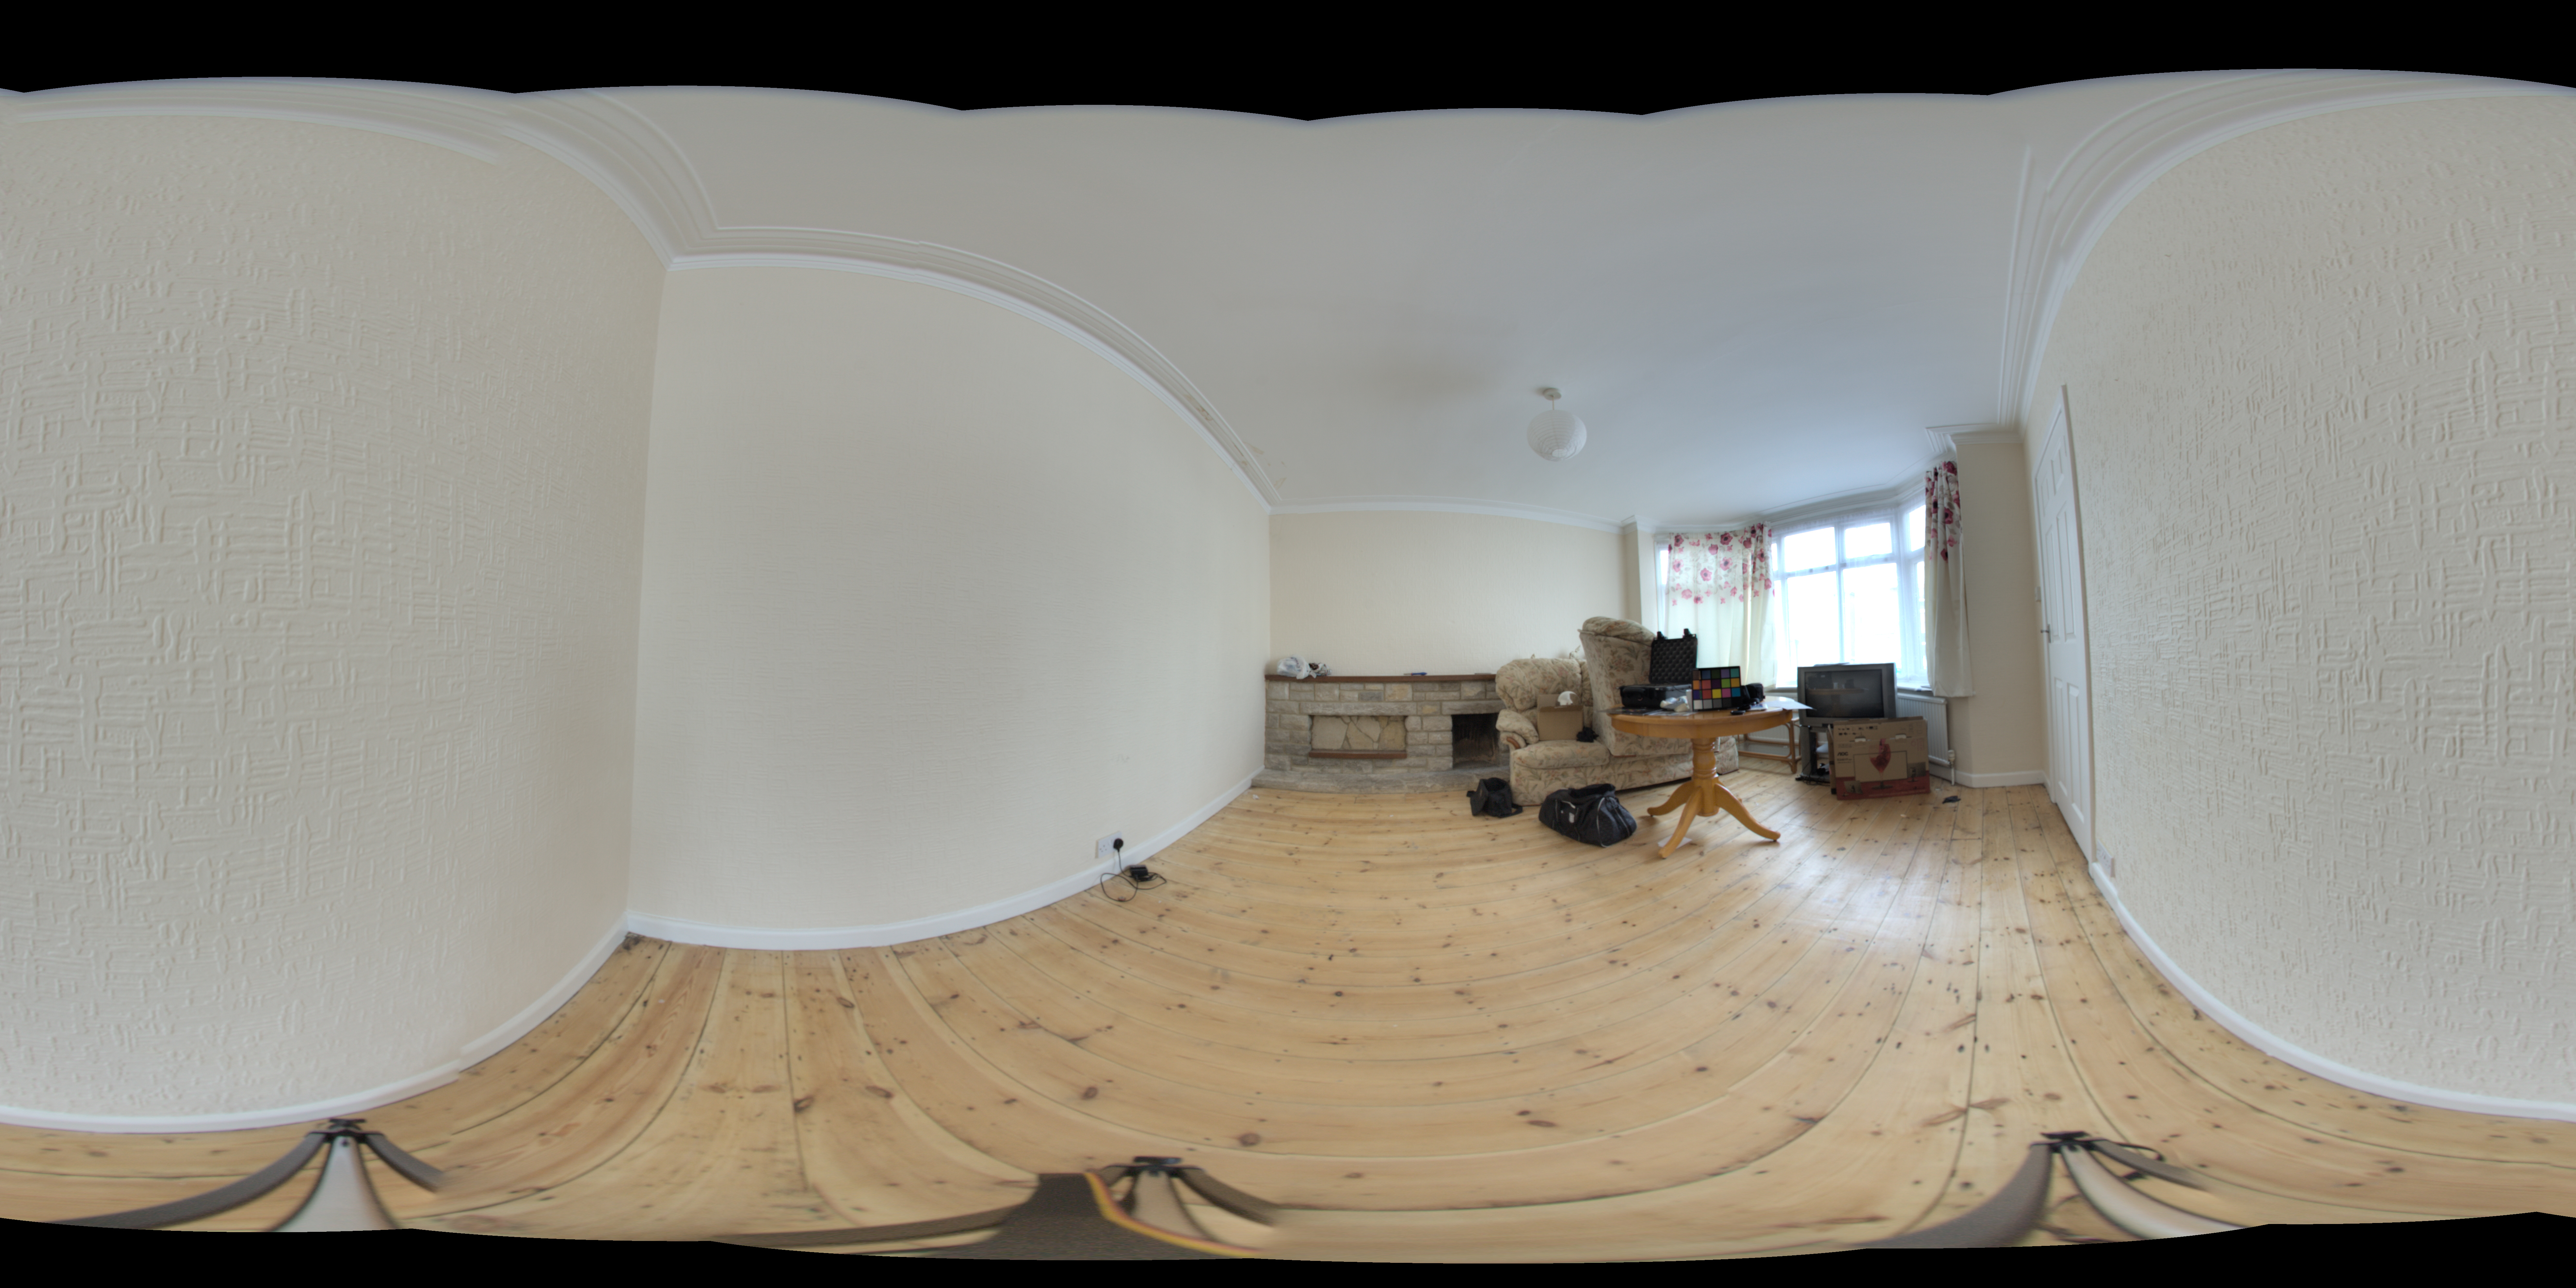
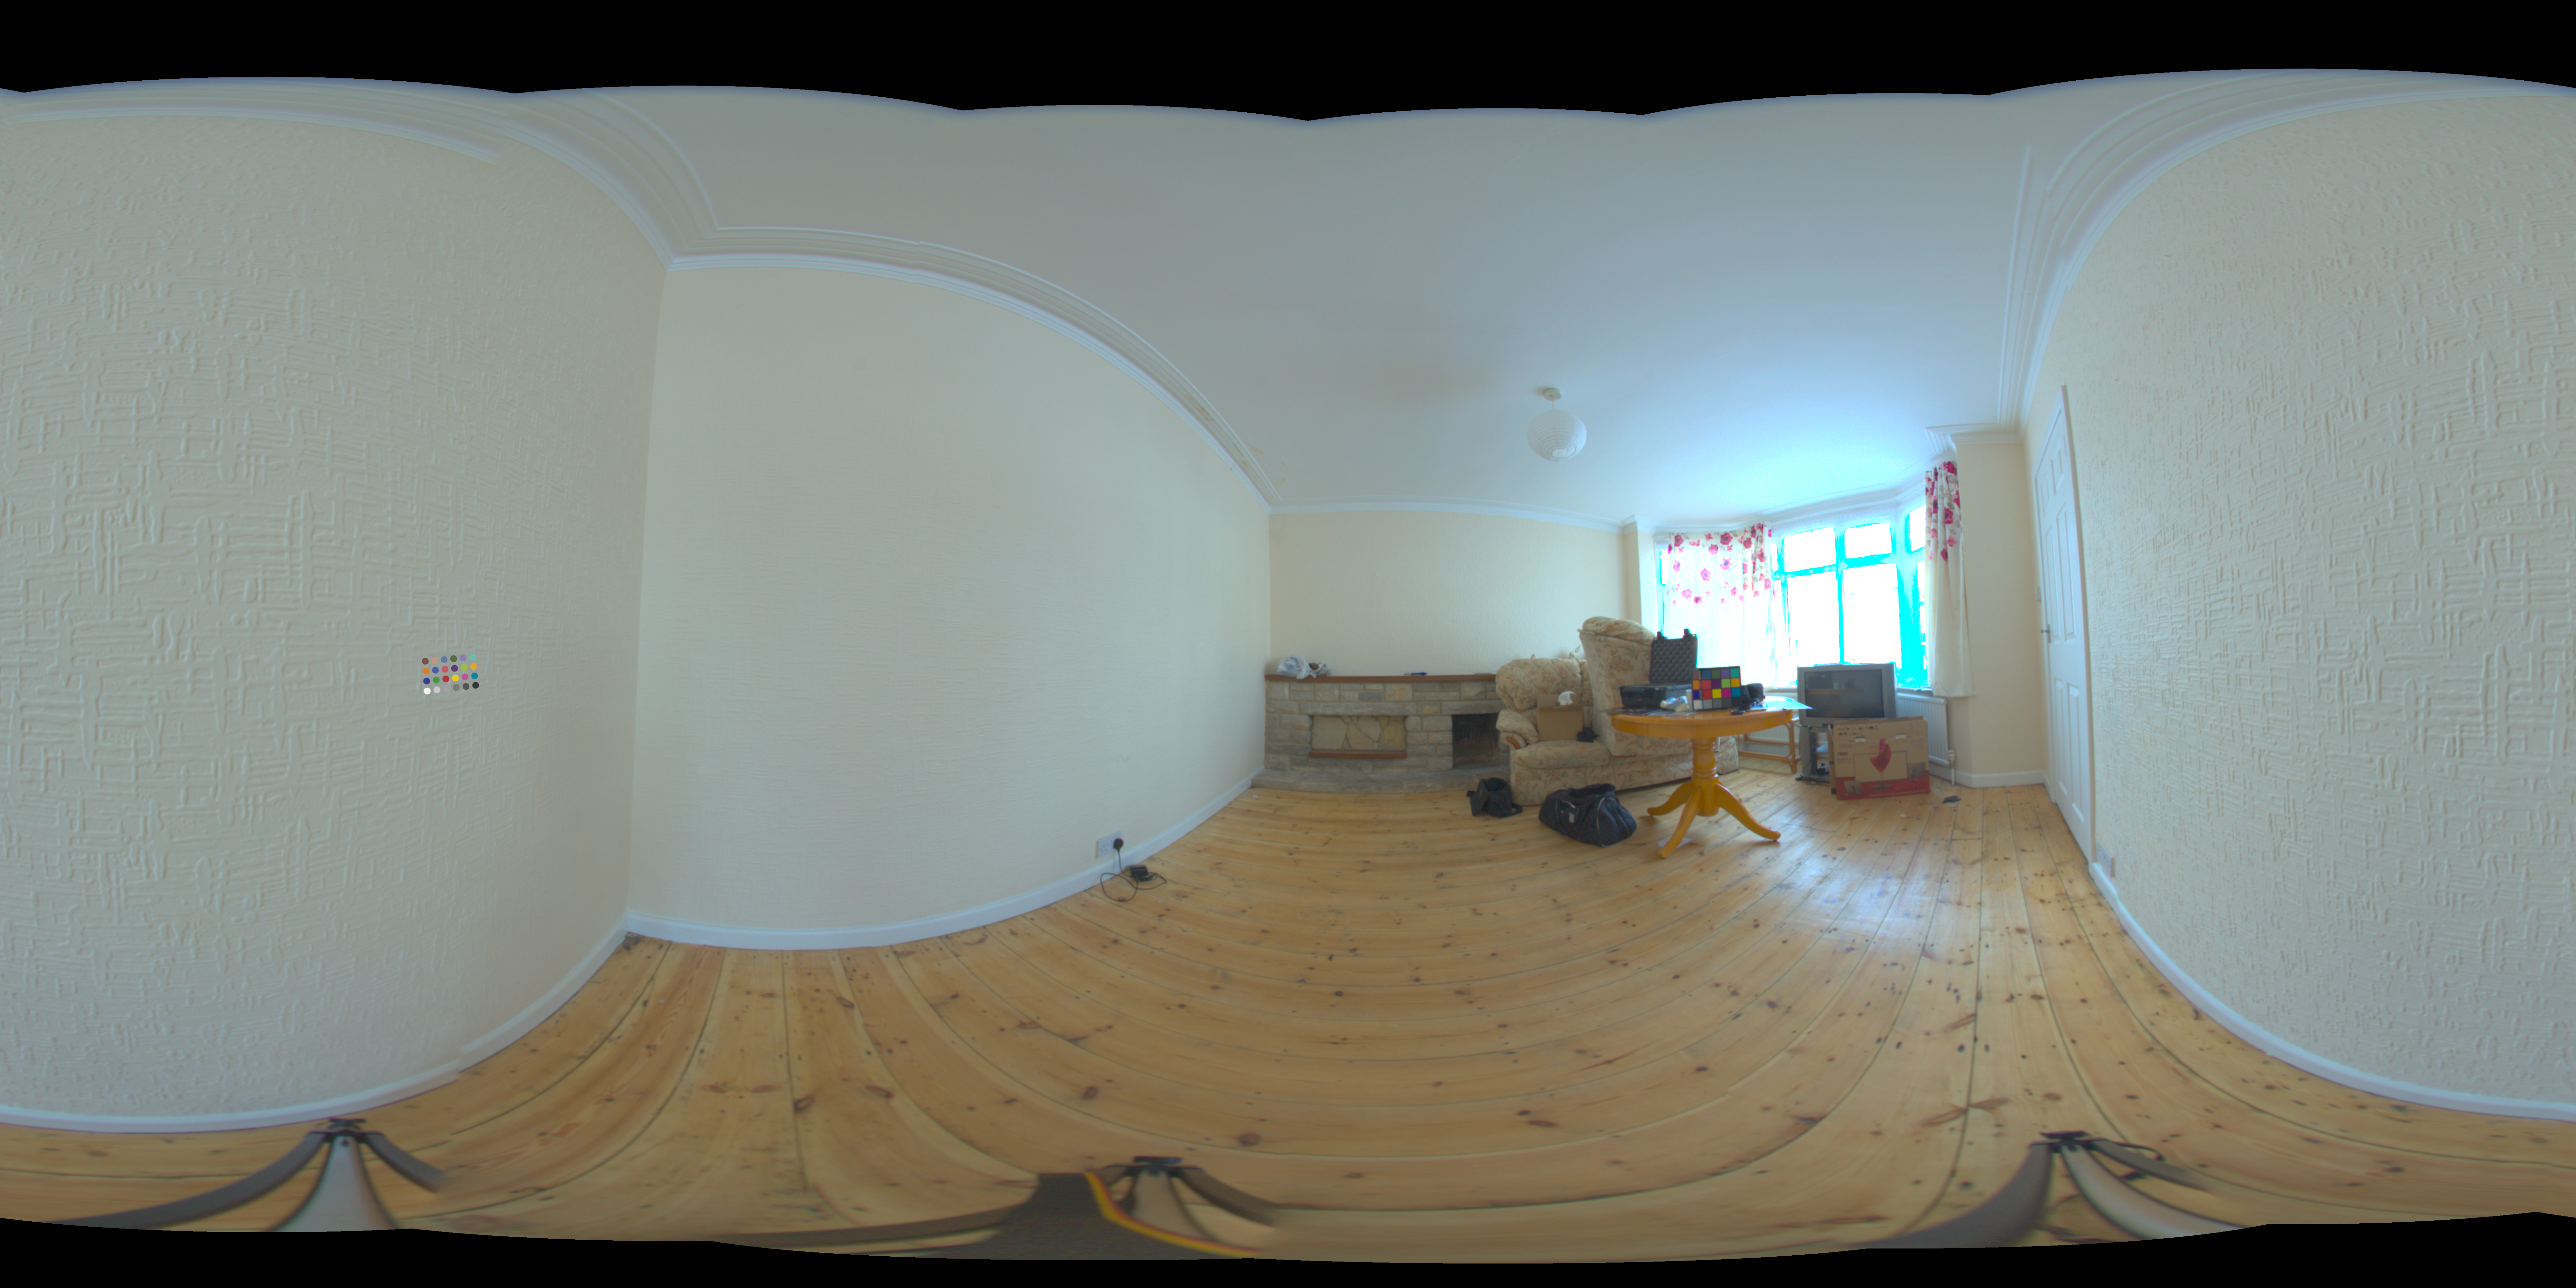
The HDRI panorama was also quite a simple process. Due to the VR tripod’s incremental angle clicking feature, I could rotate the 5D at exact 60 degree angles. With the fisheye, this allowed me to capture the whole room very easily.
The HDRI map was made using PTGUI which was crazy simple to use. Cheers guys! Using the colour checker chart, shot both in my HDRI and backplate, I remapped the HDRI colours to be accurate. I did this using the mmColorTarget gizmo in Nuke, which was real easy to use.
I loaded in my RAW CR2 files using UFDraw, after finding DCRAW to be not user-friendly and time consuming to use. The necessary files were then converted to 16 bit tif files.
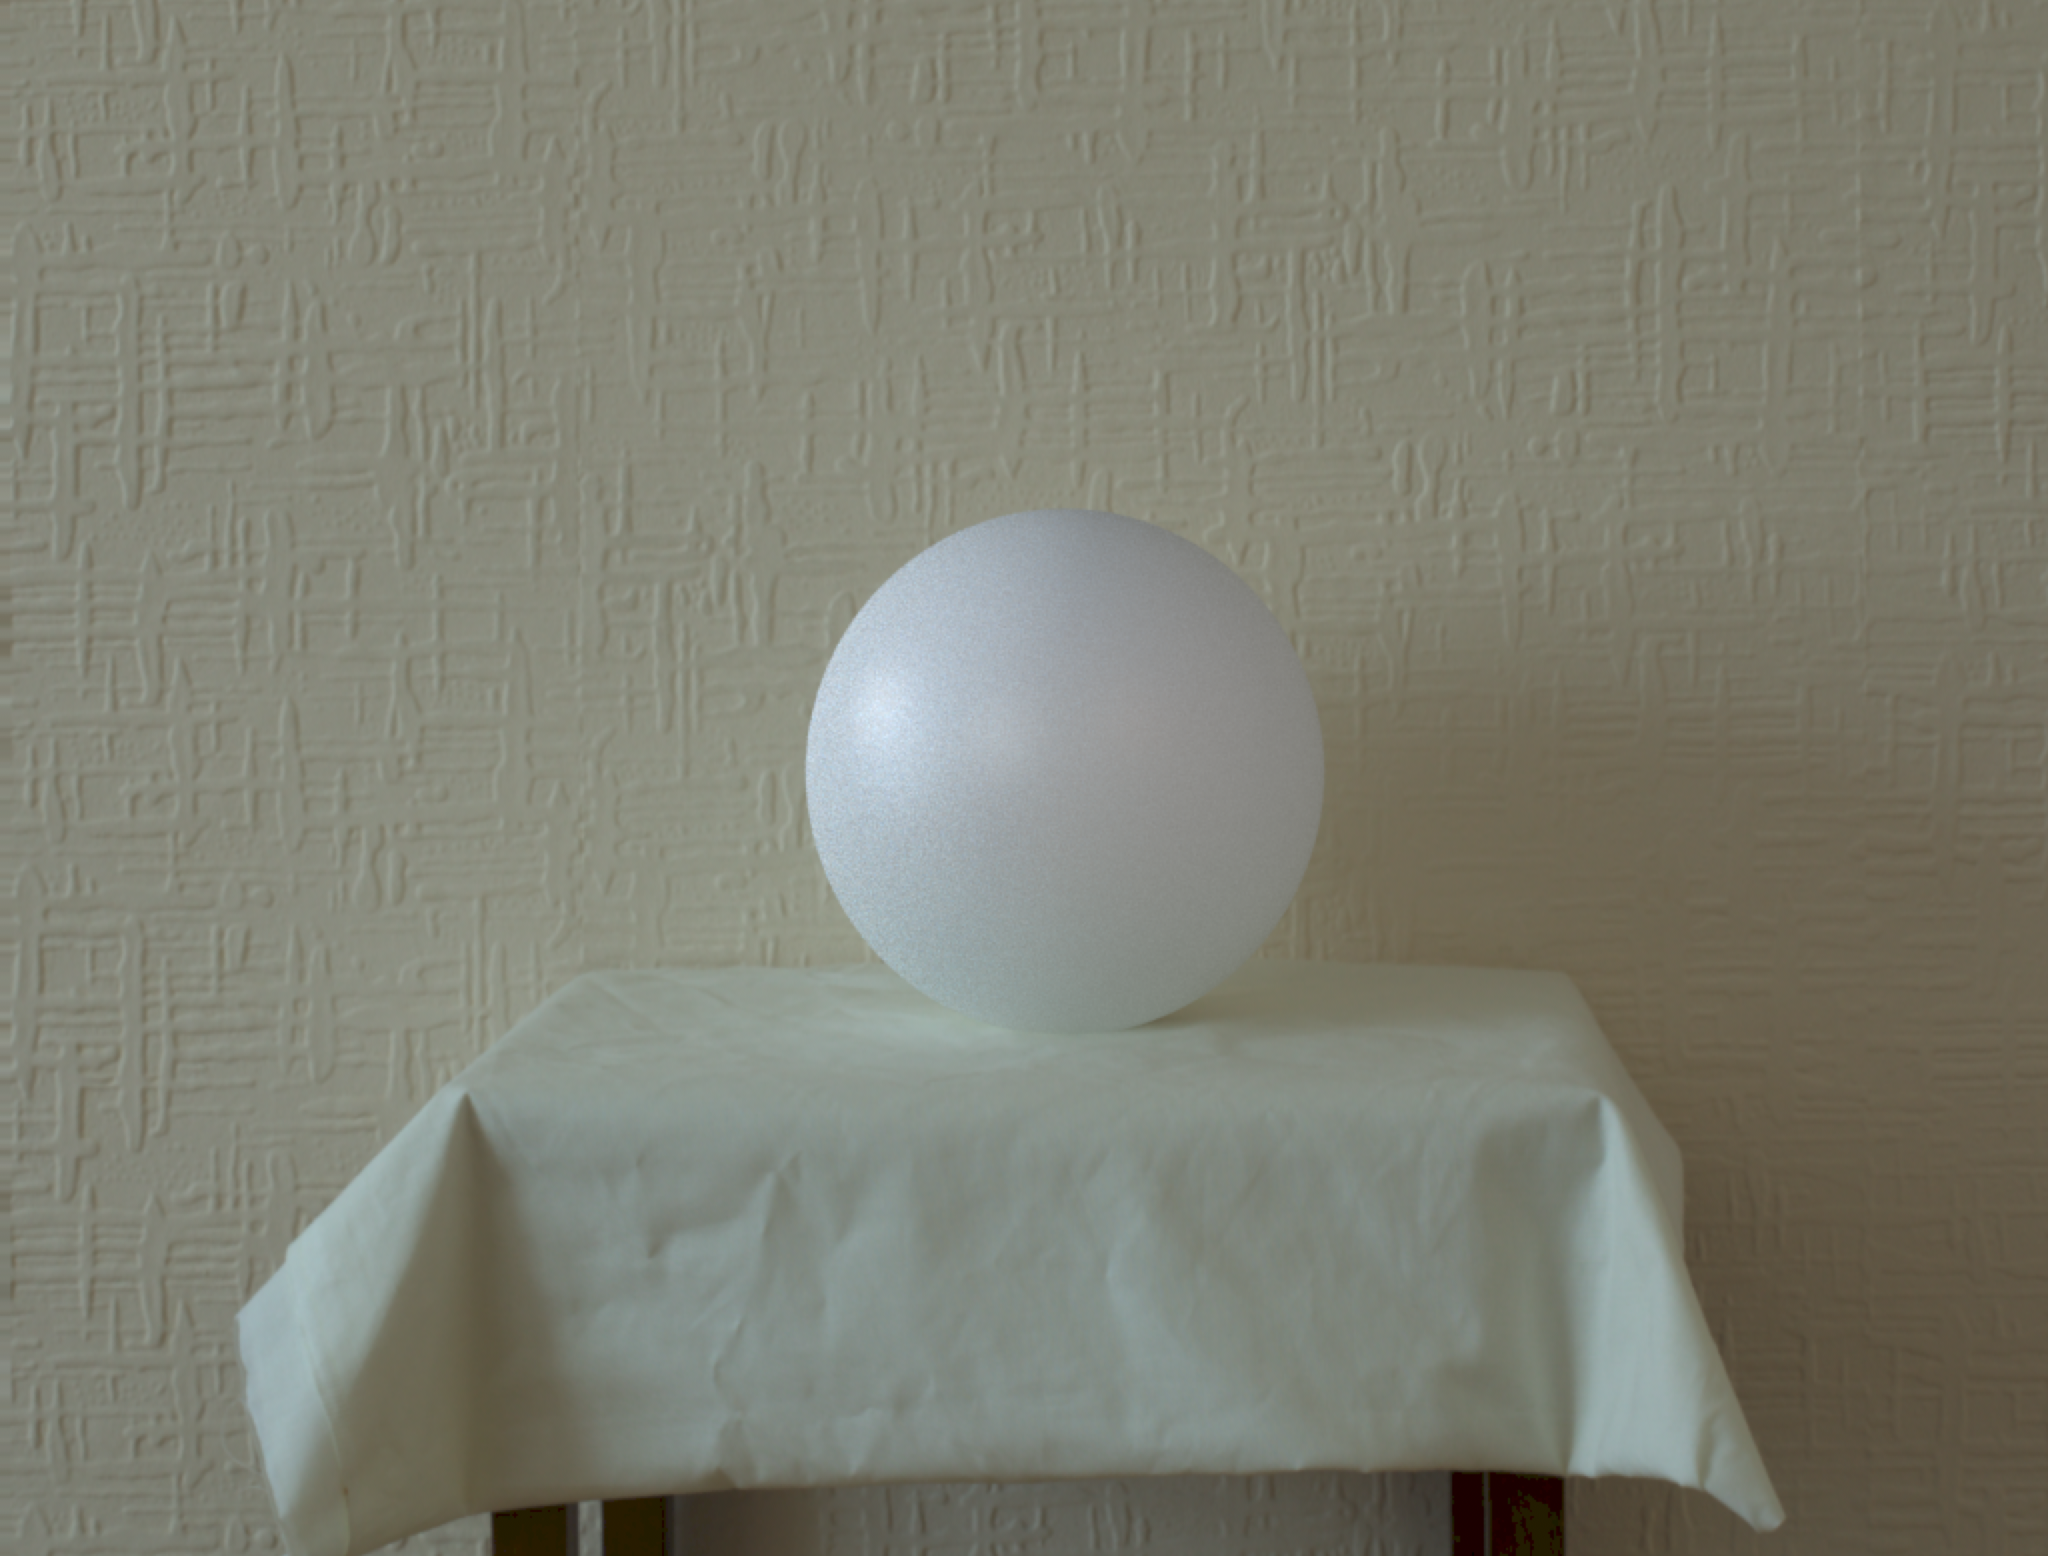
I photographed a white ball, and a chrome ball for the light match in the initial stage.
I modelled the table, proxy geometry, and cg geometry in Maya. I then had to align this using my camera’s image plane as reference. This was a simple process but took some time to do exactly. The first thing to do is change the focal length of the camera to match the real lens. So I changed mine to 50mm.
I used a technique I learnt from the head modeller at MPC , who gave a workshop on modelling at the NCCA. I grouped the camera, and locked the translation attributes. Then locked the rotation attributes of the camera itself. Using this gave me more control, and allowed me to undo camera movements if I needed to.
After a little playing around, the match came pretty close.

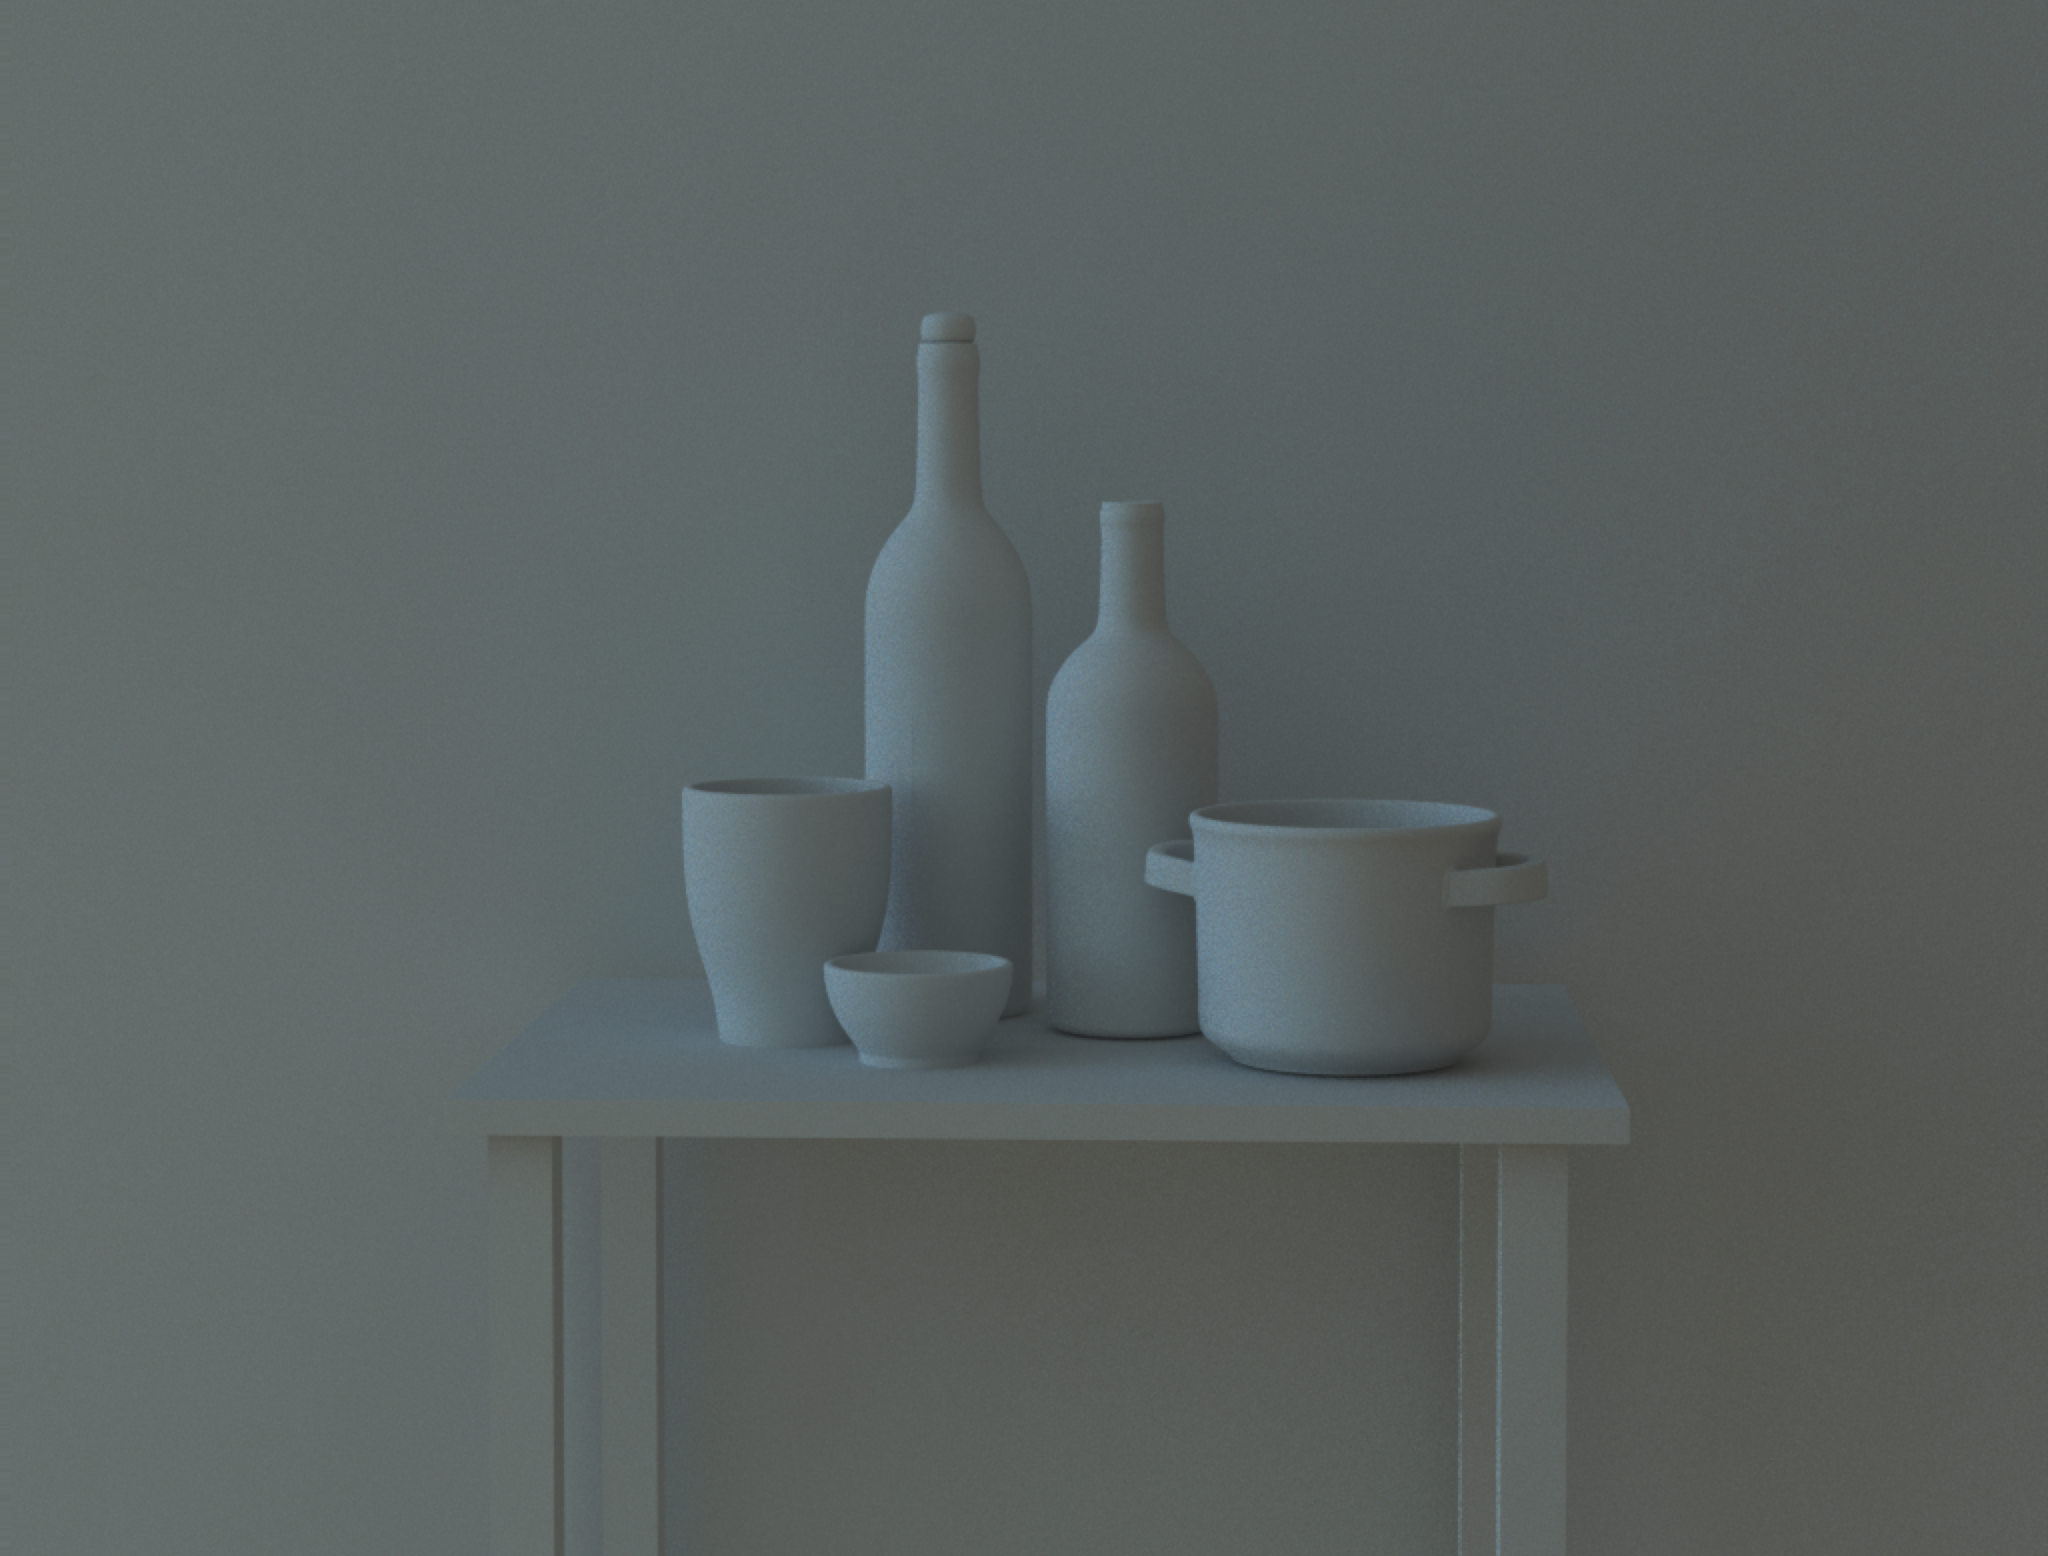

The clay renders above were taken using just the HDRI map. As you can see, this didn’t capture the lighting information completely. I used a few additional Vray rect lights to compensate.
I made the porcelain material from a VrayMtl1. I tweaked the parameters to match the real objects. The material was quite simple but seemed to match quite well.
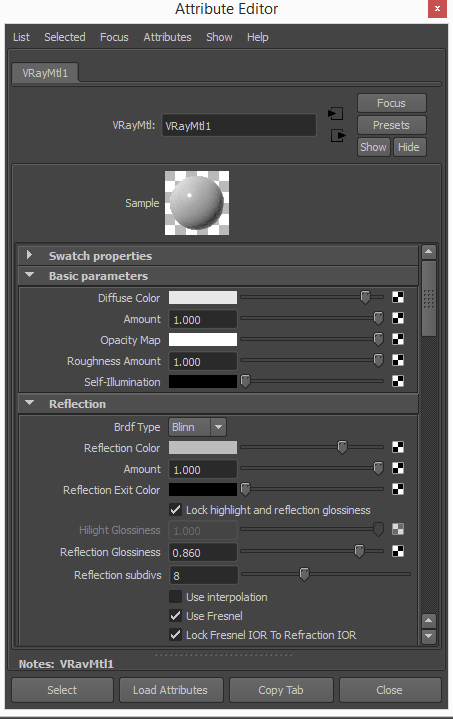
The most important parameter in this case was the IOR which was 1.530, after Pearl which I found quite similar. I kept tweaking the reflection colour, above all to get the right specularity, and eventually moved the roughness and glossiness for the finishing touches.
I then rendered everything in passes. This was quite difficult for me as I’d never really done this before. I used Vray Object Properties to separate the render elements in their render passes. I rendered the shadows using the matte surface method.
Once this was done I jumped on to Nuke. This was also quite difficult for me but through practice and logic I got through it alive. I definitely learnt a lot through this process.

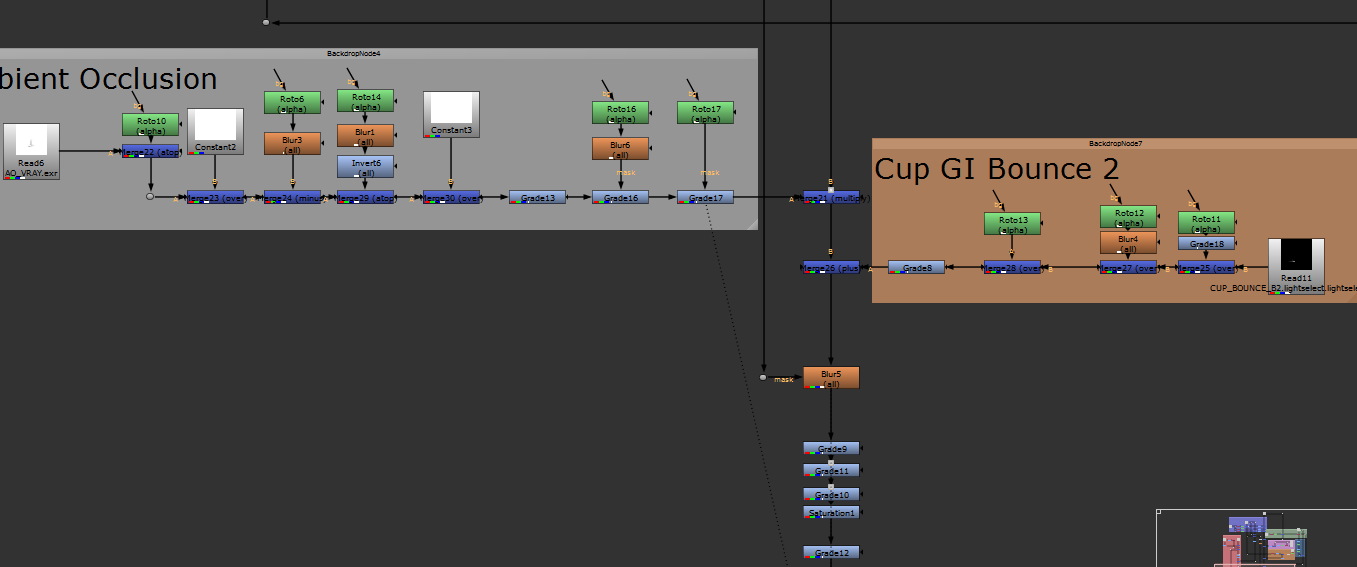
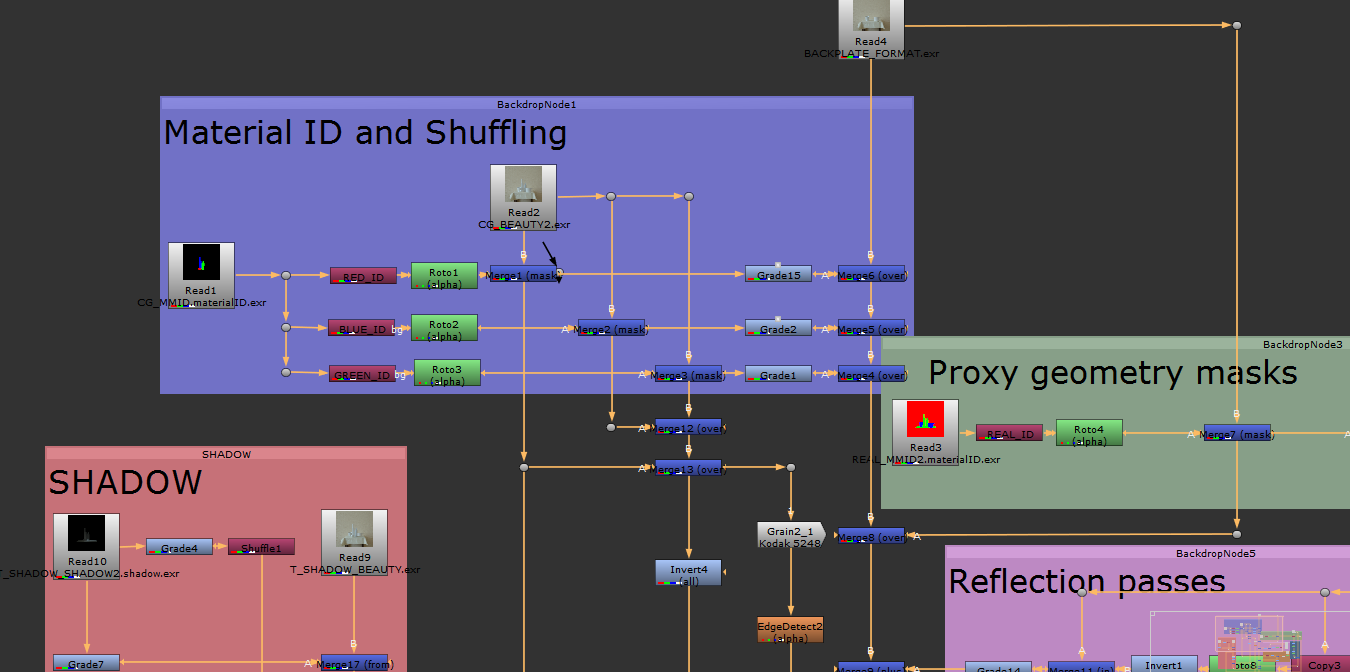

As you can see, the node graph was a little too complicated for its own good. But I know what I’d do different now. I used Material ID passes to separate the geometry, and used a whole lot of masking and rotos to achieve the other effects, using some passes such like with the shadows or GI bounce.
So that concludes that! Hope you’ve enjoyed my little write up. Cheers 🙂
